My mom's best friend is turning 60. Happy Birthday,
Sherry! (Although this post will be sometime after her birthday - I'm such a
procrastinator.)
Here is a little of the back story: My mom's mother (my grandmother) and Sherry's mother were friends and neighbors, so my mom and Sherry grew up together. And her daughter and I grew up knowing each other. So, this birthday feels not only like a celebration of her life, but also their 60 years long friendship.
Guests of her party have been asked to bring a gag gift. After a little shopping, I couldn't bring myself to buy the normal over-the-hill gift. The birthday girl is a sophisticated, beautiful lady. So I decided to make her a book of "tools" for those over 60 to fit the gag-gift theme but stuff she could reuse.
This is what I came up with: (forgive the pictures - I am using my camera phone and the lighting is terrible).

I purchased the book
at TJ Max. It is a large, over-sized book that feels a little like leather. I
made the letters. I will come back to those.
This is the side view of the
book. It has a texture and look of gold leafed pages.

The book is actually
a box. It is lined with a soft fabric. I purchased items and added tags with
cute little sayings I found on a website for over-the-hill games. Also, I added
a funny certificate of maturity to the inside of the lid with the birthday
girl's name and birthday, but I don't have a picture of it.

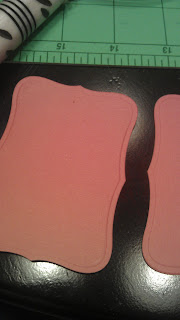
To make the tags, I
used paper that coordinated with the color of the book. I then used the same
paper to make the letters on the book. The first layer is a salmon color that I
cut with Nestabilities and then embossed for a raised edge. I inked the edges in
brown.
I typed sayings in a Word document with my desired font.
I picked a fancy font to go with the traditional feel of the gift. Then I
printed them on cream cardstock (close up it looks a little like antique paper).
I used an oval Nestiability that would fit nicely over the bottom layer to cut
out the sayings. I also inked the cream, oval paper in brown.

I punched holes in the tags and used brown ribbon from
Michael's sale bin and tied the tags to all the items. I found these cute
sayings on a website years ago, and unfortunately I've forgotten exactly where.
. . . My favorite is the magnifying glass. It says "To help you see the fine
print now that your eyesight isn't what it use to be." I made the print smaller
and smaller so that the magnifying glass was needed to read the last part "what
it use to be."

An over-sized paper clip in pink. Sometime ago I saw a
paperclip that was actually a large silver paper weight. That is what I wanted
but could not find one in time for the party, so I purchased this one at Walmart
in a pack of 4 for about $2.00. Also Joann Fabric's has an over-sized wooden
clothes hanger that I believe would be really cute!

The tag says "because sometimes it's hard to hold it all
together as you get older"

Marbles "for when you lose yours" and Mints "so you can
remember all the things you're "mint" to do"

I couldn't find Gummy Teeth that I liked so I left this
out of the box. I did have a Balloon "to hold the hot air you're full of." It's
not pictured because we got it the day of the party. I purchased a tiny balloon,
had it blown up just enough so it would fit in the box when closed. I had a
vision that it would float out of the box when it opened, but there wasn't
enough helium so it wouldn't float. (I'll know better next time!)

I cut the letters from Storybook Cricut cartridge using
Cricut Design Studio (the Craft Room wasn't up and running yet) with the same
cardstock as for the bottom layer of the tags. Using brown ink and a natural
sponge, I inked the sides and front of the letters to give them an aged look.
(Unfortunately my camera doesn't do them justice!)

I adhered the letters with my ATG gun. I ran the adhesive
over my finger and kind-of balled it up and stuck it to the letters. I wanted
the letters to be removable so she can use the book in the future.
In the end, I decided to cover the top of the letters
with Glossy Accents. It made the letters look and feel like part of the book.
Can you see how they shine and reflect the light just like the cover of the book
does.
It was a hoot watching her open it and go through all the
items!
HAPPY BIRTHDAY!!!


